Grilled Corn on the Cob (3 Methods) — Ready in 20 Min
- Makes 4
- Prep 5 minutes
- Cook 15 minutes
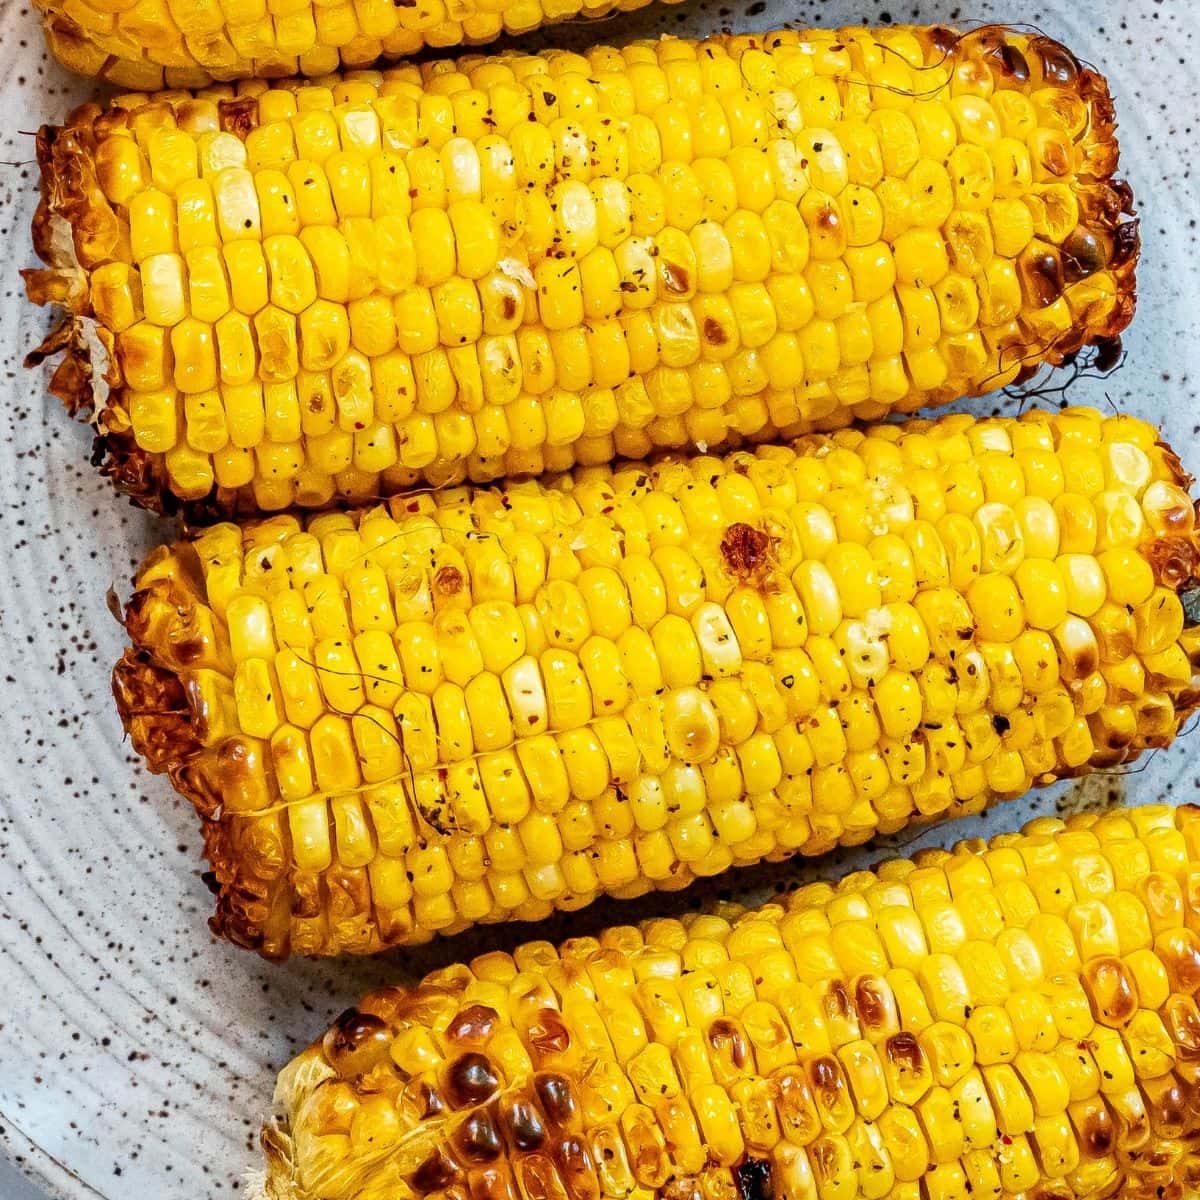
We've tested every popular method for grilling corn on the cob – boiling first (a step we're cutting), soaking husks overnight, leaving the husks dry, foil packets, no foil, and naked right on the grate – across a few summers and lots of bags from our farmers' market. This guide breaks down the three methods that actually deliver sweet, juicy kernels with that signature charwhen to use each, and exactly how long they take.
No soaking the night before. No pre-boiling. No 45-minute waits. Pick a method below, match it to your grill setup, and you're eating corn in 12 to 22 minutes.
At Avdaye, we add lots of tips in all of our recipes – because we are a home cook without any formal training, and we find we are more confident making dishes when we understand why it works, and what each ingredient means to the flavor of a recipe. Our goal is for even the most beginner home cook to feel empowered in the kitchen.
How to Grill Corn on the Cob
We're going to share the three easiest methods for solid grilled corn – and how to pick the right one for your time and dinner!
MethodTotal timeBest forChar levelFoolproof ratingFoil packet18 minMost home cooks, families with kidsLight, even*****Husks-on (soaked 15 min)22 minSmoky depth without losing moistureMedium, steamed****Direct on grate (shucked)12 minChar-heavy finish, elote, saladsHeavy, blistered***We are going to focus primarily on the Direct on Grate Method – for foil packet and husks on the method is primarily the same, with a soak before (if you dont want to remove the husks, though you will still season and remove threads), or popped into a foil pouch for more even cooking.
Grilled Corn on the Cob Ingredients
To make this recipe first assemble the following ingredients:
- Corn (4) – you can choose to keep the husks on for an extra smoky flavor (we are adding information on how to do this under tips below), but we find the best results from removing husks. Corn silks (the long, silky “hair” corn has), need to be removed either way.
- Soft butter or olive oil (4 tablespoons) – we love the rich, savory flavor butter brings out of corn, but olive oil or another oil you love also works.
- Sea salt and pepper (1/2-1/4 teaspoon) – how much you season your corn depends on your preference – but you will use a bit more than you think, since some will fall off due to corn's shape, so plan for a bit extra knowing it's not going to all make it onto your corn cobs.
- Foil – if your grill sticks, you will want to use foil to cook corn without letting it stick.
3 Steps to solid Grilled Corn
No matter your method, we have three simple focus areas: prepseasoningand grilling.
Prep
Preheat grill to 450 degrees or high temp on a gas grill. Remove strings, whether you're leaving husks on, cooking in pouch, or on grate.
Season
Generously coat corn with butter or olive oil, salt and pepper.
Grill
When corn is lightly charred, kernels have wrinkled a bit, and are soft to the touch, corn is done.
How to Grill Corn on the Cob: 3 Methods
There's no single “right” way to grill corn – there's the right way for what you're making. After more ears than we'd like to admit, these are the three methods we actually use, and exactly when we reach for each one. All three skip the pre-boiling and finish in about 20 minutes or less.
Not sure which to pick? Foil is the most foolproof and the best for feeding a crowd of kids. Husks-on gives you the juiciest, lightly smoky corn. Straight on the grate gives you that blistered, char-streaked corn you want for elote and salads.
Method 1: Foil Packet (Easiest – Start Here)
This is the one we make most. The foil traps butter and steam so the corn comes out tender and seasoned all the way through, with zero risk of sticking or scorching.
- Preheat your grill to 400°F (medium-high).
- Prep the corn. Remove the husks and silks and pat each ear dry – dry corn browns better than wet corn.
- Butter and season. Lay each ear on a square of foil (use two overlapping sheets so butter can't leak out). Rub all over with softened butter, then season generously with salt and pepper.
- Wrap tightly. Roll the foil around the corn and twist the ends closed to seal in the steam.
- Grill 13–15 minutesturning every 4–5 minutes. You'll hear the butter sizzling inside – that's the sound of dinner.
- Rest 5 minutes in the foil before opening. The trapped steam finishes cooking the kernels. Open away from your face – that steam is hot.
Method 2: Husks-On (Juiciest, Lightly Smoky)
Leaving the husks on lets the corn steam in its own wrapper while picking up a whisper of smoky flavor. It takes a few extra minutes but rewards you with the most tender, sweet kernels of the three.
- Peel back the husks without tearing them off the cob. Pull away all the silks, then fold the husks back up over the corn.
- Soak 15 minutes in cold water. This keeps the husks from catching fire and creates steam as the corn cooks. Fifteen minutes is plenty – you don't need to soak overnight.
- Preheat your grill to 400°F (medium-high).
- Grill 18–22 minutesturning every 5 minutes. Shake off excess water before the corn hits the grates.
- Check for doneness. The husks will char and start to pull back, and the kernels underneath will be bright and tender.
- Peel and serve. Fold the husks back (they make a great built-in handle) and slather with butter, salt, and pepper.
Method 3: Direct on the Grate (Most Char – Best for Elote)
When you want serious char – blistered, blackened-in-spots, smoky-sweet corn for Mexican street corn or a grilled corn salad – go straight on the grates, no wrapper.
- Shuck the corn completely and remove all the silks. Pat dry.
- Preheat your grill to 400–425°F (medium-high).
- Oil, don't butter. Rub each ear with a little olive oil. Save the butter for after – butter burns over direct flame, oil doesn't.
- Grill 10–12 minutesturning every 90 seconds to 2 minutes, until the kernels are blistered and charred in spots all the way around.
- Butter or dress immediately. Off the grill, slather with butter while it's screaming hot so it melts right in – or roll in mayo, cotija, chili, and lime for elote.
Kitchen notes
How to grill without husks. Removing husks from corn before adding it to the grill does two things – it does lower the smoky flavor charred husks brings to grilled corn, and can make corn more prone to burning and sticking on your grill grates. Corn's husks are great for naturally protecting the corn on the cob as you grill it – but can also be a pain. We're going to help you decide if you want to grill corn with or without the husks, and how to make sure either way is solid!
Start with the freshest corn you can find. Peak, just-picked sweet corn is the whole game. Look for tight green husks, plump kernels you can feel through the silk, and a moist, freshly cut stem. If the corn's been sitting in your fridge for a week, no method on earth is going to make it taste like summer.
Match your fat to your method. Butter in the foil and husks; oil on the open grate. Butter gives you that rich, savory flavor when it's protected, but it burns and flares over direct flame – so for the grate, oil first and butter after.
Don't over-soak. Fifteen minutes of soaking is plenty for the husks-on method, and you can skip soaking entirely for foil or shucked corn. Drowning your corn overnight means soggy husks and a longer wait.
Crank the heat. Grilled corn needs a hot grill – 400°F and up. Too low and the corn steams without ever getting that gorgeous color and char. If your grill's already fired up for burgers or steaks, the corn's happy right there next to them.
Turn more often than feels necessary. Corn is round, your grill is flat – the only way to get it evenly cooked and charred is to keep it moving. Every few minutes for foil and husks; every 90 seconds or so for corn directly on the grate.
Keep it from sticking. Plenty of fat is your friend. For foil, a generous coat of butter does it. For the open grate, oil the corn (not the grates) and make sure your grates are clean and hot before the corn goes down – corn releases naturally once it's properly charred, so if it's stuck, it's usually not ready to turn yet.
Know when it's done. Forget the timer as your only guide. Grilled corn is ready when the kernels look slightly wrinkled, feel soft when you press them, and have a golden-to-light-brown char. Texture and color tell you more than the clock.
Let foil-wrapped corn rest. Pull the foil packets off the grill and let them sit, sealed, for 5 minutes. The steam finishes the job and keeps everything juicy. vent carefully when you open them.
Want smoky flavor on a gas grill? Propane can't give you that charcoal smokiness on its own – so cheat. Lay a husk or two right on the foil with the corn, or leave one or two husks attached on the husks-on method. As they char, they'll perfume the corn with that wood-smoke flavor you're missing.
Butter while it's hot. However you grill it, the second corn comes off the heat is the moment to butter it. Hot kernels drink up butter, salt, and seasonings; lukewarm corn wears them.
Keep corn from sticking to grill. To keep corn on the cob from sticking to your grill grates, be sure there is a good amount of fat (butter or olive oil) all over your corn to help it caramelize without sticking, as well as pull out corn's rich buttery flavors. Cooking corn on the cob in a foil pouch makes it easy to toss on the grill without worrying about sticking, burning, or making cleanup messy – so when grilling corn without husks, we always grill it in a foil pouch to provide the solid mess-free way to get corn to not stick to the grill grates.
Serve it with
This corn is good with Grilled Huli Huli Chicken Kabobs – the lightly sweet marinade is so addictive! We also love corn with Easy Grilled Ribssolid Grilled Souvlakiand Spicy Grilled Watermelon for dessert!
If you're looking for hearty side dishes to serve alongside your grilled foods, check out our favorite BBQ side dishes archive here.
Grilled Corn on the Cob FAQs
What temperature should we grill corn on the cob at?Set your grill to medium, about 350 degrees – or if your grill is set higher for steaks or burgers, move corn to a higher rack.
When is corn done cooking?Corn is done when it is soft to a light touch, and looks a slight bit wrinkly, before kernels wilt and pop.
How do we store this recipe?Grilled corn can be refrigerated on the cob, or cut from the cob, and stored in an airtight container, for up to four days. Freeze for up to four months.
What type of corn works best?Any -sweet variety: bicolor (Peaches & Cream, Honey & Cream), yellow (Bodacious), or white (Silver Queen). Look for tight, green husks; plump kernels visible through the silk; and a fresh-cut stem. Skip anything that feels rubbery.
How long does grilled corn last?Refrigerated on the cob: 4 days. Refrigerated cut from the cob in an airtight container: 4 days. Frozen, cut from the cob: 4 months. Reheat in butter in a skillet over medium heat or in a 350°F oven covered with foil.
Can you grill corn ahead of time?Grill it up to a day ahead. Let the corn cool, wrap it tightly in foil, and refrigerate. To reheat, place the foil packs back on a 350°F grill for 5–6 minutes, or in a 350°F oven for 8 minutes.
Why is our grilled corn tough or chewy?Three usual causes: corn that's past peak (more than 48 hours from harvest), grill temperature too low (kernels steam without softening starches), or under-cooking. Fresh, peak-season corn cooked at 400°F+ will be tender every time.
How do you grill corn for elote?Use the direct-grate method to get heavy char on shucked corn. While the cobs are still hot, brush with a mix of mayo and crema, then roll in cotija, chili powder, and lime zest. Finish with a squeeze of lime and chopped cilantro.
Can you grill frozen corn on the cob?Yes. Frozen corn is already blanched, so you only need to heat it through and add char. Wrap each cob in buttered foil and grill 8–10 minutes, turning every couple of minutes.
Can you grill corn without foil?Yes. Shuck the corn, rub it with oil or softened butter, then grill directly on a clean grate at medium-high. Turn every 90 seconds for 10–12 minutes until the kernels are blistered and bright yellow.
Do we have to soak corn before grilling?Husks-on gives you steamed, juicy kernels with a faint smoky finish – best when you want tender corn for a side dish. Husks-off gives you deeper char and is the move for elote, grilled corn salads, or anytime you want pronounced grill marks. Foil sits between the two.
How long does it take to grill corn on the cob?Plan on 12 to 22 minutes total depending on method. Foil packets at 400°F take 13–15 minutes. Husks-on takes 18–22 minutes. Direct on the grate without husks takes 10–12 minutes with frequent turning. Add a 5-minute rest after pulling foil packets off the heat.
What temperature should we grill corn at?Medium-high – 400°F to 425°F at the grate. Lower than that and the corn steams without charring; higher and the kernels scorch before they soften.
Ingredients
- 4 ears of corn, cleaned with husk and silks removed
- 4 tablespoons room temperature, soft butter or olive oil
- 1/2-1/4 teaspoon sea salt and pepper per ear of corn
- pepper, to taste
- 4 large squares of foil
Method
- Preheat grill to 450 degrees or high temp on a gas grill.
- De-hull corn and remove all strings.
- Pat dry with paper towel to remove any excess moisture from corn.
- Generously coat corn with butter, salt and pepper.
- Wrap in foil tightly.
- Grill for 45 minutes on a top rack- turning sides every 10 minutes.
- When corn is lightly charred, kernels have wrinkled a bit, and are soft to the touch, corn is done.
- Let cool 5-10 minutes before serving.